概述
ConstraintLayout 是一种构建于弹性 Constraints(约束)系统的新型 Android Layout,使用方法和 RelativeLayout 类似,但是比它更灵活和更容易使用。
依赖包
1 | To use ConstraintLayout in your project, proceed as follows: |
现在 Android Studio 2.3 工具默认新建的 layout 就是 ConstraintLayout,作为官方标配。而且支持将其他官方 layout 一键直接转换为 ConstraintLayout。
View 的尺寸
三种值
与其他 Layout 不同之处在于,它的 layout_width 和 layout_height 不支持设置 match_parent,其属性取值只有以下三种情况:
- wrap_content
- 指定具体dp值
- 0dp(match_constraint,any size)
0dp 的用途
代表填充约束之意(any size),注意不要以为和 match_parent 是一样的;match_parent 是用于填充满当前控件的父布局,而 any size 是用于填充满当前控件的约束规则。
- 填充屏幕宽度
1 | <Spinner |
- 设置特定的宽高比
1 | <ImageView |
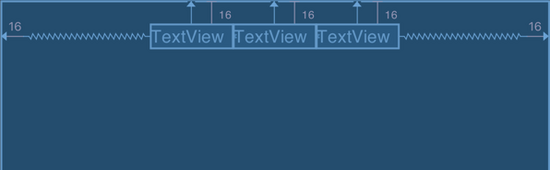
链(chain)
Chain 链是一种特殊的约束,让多个 chain 链连接的 Views 能够平分剩余空间位置。和 LinearLayout 中的权重比 weight 很相似 ,但 Chains 链能做到的远远不止权重比 weight 的功能。
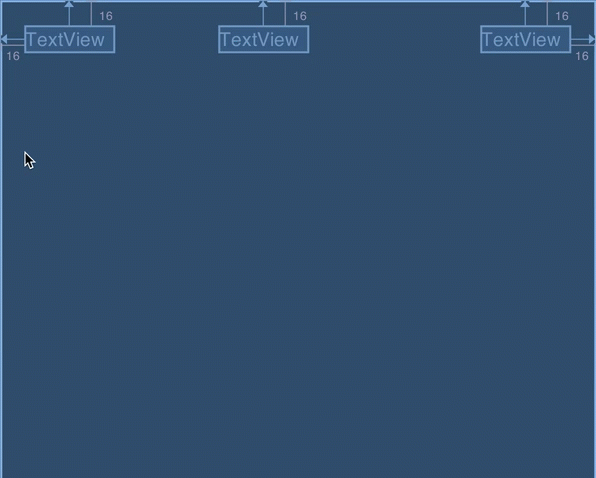
创建链
选择多个想要链接到一起的 Views ,然后再右键选择 Center Horizontally 或者 Center Vertically 来创建水平链或者垂直链。如下,创建一个水平链:
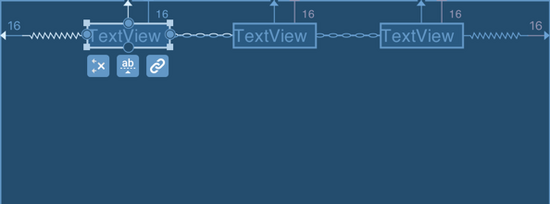
链的模式
- spread chain
Chain链的默认模式就是spread模式,它将平分间隙让多个Views布局到剩余空间
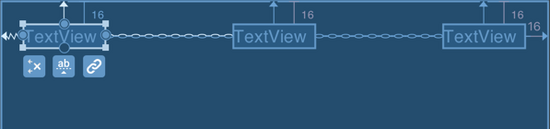
- spread inside chain
spread inside模式,它将会把两边最边缘的两个View到外向父组件边缘的距离去除,然后让剩余的Views在剩余的空间内平分间隙布局
- packed chains
packed模式将所有Views打包到一起不分配多余的间隙(当然不包括通过margin设置多个Views之间的间隙),然后将整个组件组在可用的剩余位置居中。在packed chain链模式,打包在一起的Views组可以进一步通过控制修改bias值来控制打包组的位置,如bias模式是0.5将Views组居中。
链的权重
spread 和 spread inside 链可以设置每个组件的 weight 权重,类似于 LinearLayout 的 weight 权重。当前 AS 版本不能直接在视图编辑器设置这个权重,需要在 XML 文件中手动设置。
假设该 View 是在一个水平的 Chain 链中,在 XML 中设置
1 | android:layout_width="0dp" |
注意:在
packed链模式下设置权重weight并没有作用。
就是说并不像 spread 和 spread inside 模式中表现的占据尽可能的剩余空间,在 packed 模式下该组件就会被收缩成 0 大小。
示例
三个 ListView 水平并列排列,使用默认的链模式
1 | <ListView |
对应生成的效果图: